Riding a bike is rewarding and fun for many reasons, and then some routes, roads and days on the bike are better than others. We find that the more you ride, the further you want to go, and the greater the challenges you want to find.
Our preference is a ride that has plenty of elevation, and it doesn’t matter if it’s one long climb or a day of total undulation, this is where the fun is, in the hills. We also find that the greater the challenge, the greater the reward; taking on the challenge, overcoming obstacles and enjoying the immense satisfaction post ride, are all part of what makes many of us fall in love with climbing.
With Italy being such a hilly and mountainous country, in the lead up to our Italian cycling tours, we are often asked a range of questions about the terrain, the climbs and how best to prepare for our tours. So here we share many of those questions and answers, in what is our ultimate guide to climbing.
How hard is the climbing?
What are the stats for the climbs?
How fast does everyone climb?
How much does the hire bike weigh?
What should I focus on pre-tour?
How should I train?
Is there a program I can follow?
We have answered these questions under four main areas, based on a grouping of questions, that we believe provides a good balance of background, context, experience on tour, and tips for when you prepare for your next Italian cycling holiday.
1. How are cycling climbs and rides categorised?
There is not one consistent rule or approach for how a climb is categorised.
Historically, the Tour de France were the first to categorise a climb and then they kept refining it over the years. Their formula uses length and steepness, or the slope’s % gradient squared, multiplied by the length in kilometres, to arrive at a score. This is then where it becomes subjective and the category is adjusted, taking into account the position of the climb in a stage, and also the position of a climb in the race.
One thing to note also is that two climbs with a similar score, won’t always be the same if one of them has any flat sections or descents within their total length, effectively reducing the length, while maintaining the elevation.
Here is a rough guide for how the categories can look with the TDF formula.
Category 4: The easiest of the categories, ranging from under 2km @5% to 5km @ 2-3%
Category 3: This is now serious, and could be anything from 1km @10% to 10km @ 5%
Category 2: This is now demanding, with 5km @8% or 15km @4%
Category 1: This will still be a big climb, with anything from 8km @8% to 20km @5%
Hors Category: Beyond Classification: The hardest, either being the longest or steepest, or the longest and steepest.
Some GPS services opt for a simpler formula based on the average ascent and length of the climb. This is viewed by some as too simplistic due to a few factors including undulation, flat sections and descents.
As an example, one GPS service uses the climb’s length multiplied by the percentage in whole numbers to receive a score, and thus category. To be rated, it needs to be above 3% and to score above +8000. An example could be 1km x 8% or 2km x 4%.
Here is how this formula could look:
Category 4: +8,000 – 1 km @ 8% or 2km @ 4%
Category 3: +16,000 – 2km @ 10% or 6km @ 5%
Category 2: +32,000 – 4km @ 8% or 10km @ 4%
Category 1: +64,000 – 8km @ 8% or 15km @ 5%
Hors Category: +80,000 – 10km @ 9% or 20km @ 5%
There are other platforms that use a ‘Cotacol’ formula and ‘difficulty points’. This was developed in Europe in the 80’s and has evolved to use elevation and road data in short 25 metre increments, to factor in undulation, flat sections and descents.
In theory this sounds great; one formula that can be used across any climb, however this method also has a similar shortcoming, in not taking into account a climb’s changing gradient and the inability to get into a rhythm, which has a huge effect on how easy or hard a climb is to ride.
As you can see from these three categorisation systems, it is not easy to answer a question such as ‘how hard is the climbing on tour’ because while we cyclists do have some ‘measures’ and ways to categorise climbs or rate their difficulty, there is no consistent way. However, even if you do have the data, so much of the climbing experience on our cycling tours comes down to your fitness, rhythm, preparation and mindset, so we tend to focus more on these elements in the advice provided in the lead up to tours.
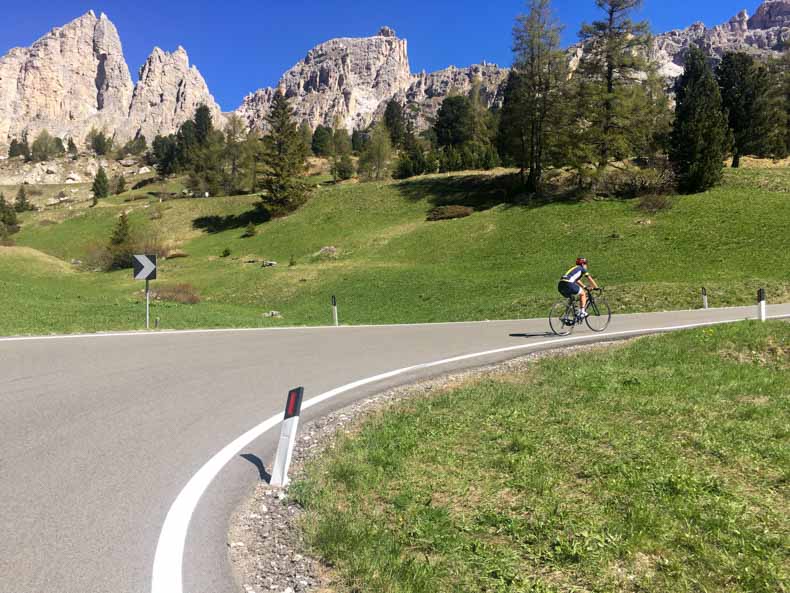
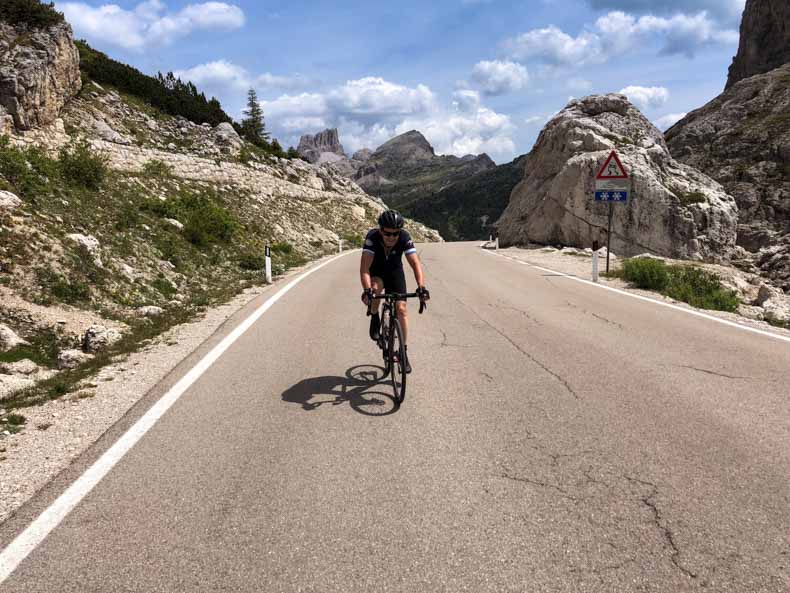
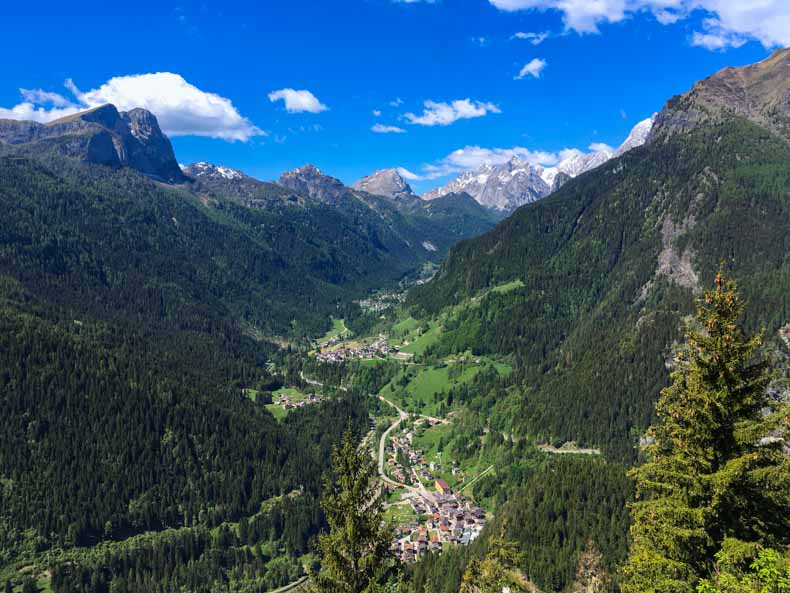
On our Giro d’Italia cycling tour and Como, Stelvio and Dolomites tour, we often ride many of the following climbs, which are categorised from Cat 3 up to the beyond category HC.
HC:
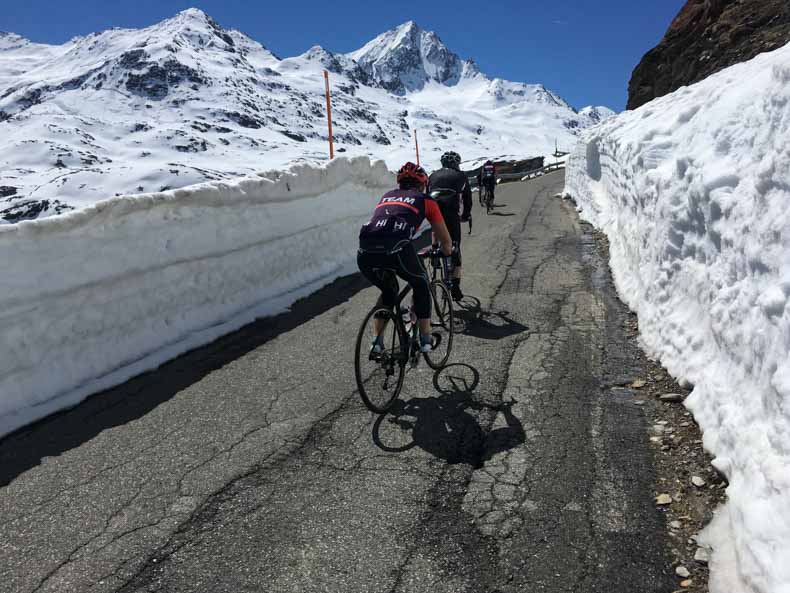
Passo Giau, Passo Stelvio, Passo Mortirolo and Passo Gavia
Cat 1:
Passo Falzarego and Passo Pordoi
Cat 2:
Ghisallo and Passo Sella
Cat 3:
Muro di Sormano, Passo di Gardena and Passo Campolongo
A beautiful day on the bike is riding the Sella Ronda loop, which has 1 x Cat 1, 1 x Cat 2 and 2 x Cat 3 climbs all within 65km. Beautiful.
2. How do I climb efficiently when cycling?
Different climbs suit different people. Short, sharp hills suit a different rider than long mountain climbs, however this doesn’t mean that you can’t get to the top without breaking yourself, whichever type of rider you are.
First things first, let’s deal with the ‘lightness’ issue, and weight of the rider and the bike. Sure, the lighter you are, the easier and quicker your ascent will be.
Some mathematical modelling has suggested that a rider weighing 75kg who is creating 250 watts (pushing hard but not a flat-out effort for most of us) on a 10% climb of 2km, could save 15 seconds if they lost 2kg, and if they lost 5kg, it would save 39 seconds.
This is all great if you’re racing, but if you’re a recreational cyclist out to enjoy the challenge on a beautiful Italian cycling holiday, our view is that we’d rather take the extra 39 seconds, and stop for a pasta and a coffee at the rifugio at the top of the climb.
Then when it comes to the bike, most of the marketing says ‘the lighter the bike, the better’ which is not always true. When you are looking at a sub 7kg bike, check whether it is fit for purpose and actually strong enough for you and your riding style. Just remember that you also need to get off the mountain, and as you are flying down the hill, it’s better to be sitting atop a machine that is assured, rather than jittery.
While efficiency is important when climbing, here is our list of the things we believe you need to consider when climbing, which go beyond just efficiency.
1. Mindset
Your attitude to climbing is huge. If you turn a corner and see the road zig zag up in the distance and you think #@!#, how am I going to do that, then your experience will be different than someone who sees the same thing and smiles, relishing the challenge. Being positive and not filled with dread is a big start. If you think you can do it, you can do it.
2. Hydrated and fueled
As you are approaching the base of the climb, take on water and some fuel, so you are topped up. This is also a good strategy if the gradients are high and you need to keep both hands on the bars as you climb.
3. A firm grip
When the % goes up, another good trick is to ensure that you are holding onto the bars firmly, however don’t clench up and be tight. You are wanting to have the best transfer of power from your body into the machine and a strong, even grip though your forearms and hands helps.
4. Ease into it
If it’s a new climb it is good to ease into it, to ensure that you have something in reserve should you need it, as you get closer to the top. It’s always better to get to the last few k’s and then push it, rather than push it early and blow up on the lower slopes.
5. Find your Sweet Spot
This is finding the gear ratio/combination that you can comfortably hold for hours, and getting into a rhythm that sees you climbing at the quickest speed, while staying under the tipping point that takes you into the red zone, where even an extra 0.2km/ph increases the feeling of effort by 5. Some people can do this by feel, others can use a balance between the gear they are in and the speed, and then others use power meters to know where their tipping point lies.
6. Let go of your ego and stay out of the red zone
Don’t let your ego run away and be caught having a “race” with yourself or anyone else on the road that causes you to push yourself beyond your sweet spot. As soon as you go beyond that sweet spot into the red zone, we believe that you will most likely pay the consequences over the next couple of days.
7, Vai vai vai…Go go go. Find your inspiration.
What are the things that inspire you to keep going and to never give up?
They could be a phrase or an image, or a song. Keep that top of mind and say or sing it to yourself, and if you are the visual type, you could go pro and follow what some in the peloton do, and either write or tape it to the top of your bars.
8. In or out of the Saddle
This depends on your riding style and whether the climb is short and sharp, or a longer climb. On a longer climb, it’s about finding a rhythm and being energy efficient, and depending on how short and sharp a climb or section is, being out of the saddle may be the only option, or it may even be of benefit. However, there is a cost with being out of the saddle as it takes more effort to maintain and hold. There is a rule of thumb that says standing on the pedals for long periods (greater than 5 minutes) costs more energy than being seated, however this is also tempered with the higher the intensity, the lessening of the negative effect of standing on the pedals. Our advice is to experiment with both to see what is the best fit for your riding style.
9. Lightness
We mentioned weight and lightness earlier. However, if you are determined to lose weight, the best way to lose weight is by riding more. Dieting can be a dangerous game, particularly if you are also riding a lot and need the fuel.
We have seen some guests join us on tour thinking that they will use this as an opportunity to lose weight while riding for 8 days. They sit down to breakfast and don’t eat very much. We make the suggestion that the fuel will be needed in the coming days, so to eat up. They say they are ok, and stick to their program of watching what they eat. It usually takes until about day 3 of being out on the bike for 6 hours a day for the realisation to hit that they need more fuel. They finally enjoy the full Italian breakfast on offer on day 4.
10. Don’t Panic. Stay in your zone.
Being a bigger rider, doesn’t mean you are a slow rider and you shouldn’t panic when better climbers up the pace. Let them go.
You need to ensure that you stay focused on your sweet spot, that you are just below your threshold. “Don’t go into the red,” he says, “you should ride at your own speed.”
Don’t be concerned if the lighter, quicker riders disappear around the corner ahead. We are all going in the same direction, and there is always a ride guide and support van behind you. We have seen some of our larger riders on tour finish stronger and quicker on the last big climbing days than lighter riders, who have often pushed themselves into the red zone in the early few days. The key is to stay focused on yourself.
11. Cadence
Again, we find that it’s different for everyone, depending on your riding style. However, a different approach is required for climbs with different gradients and intensities. Again, we suggest you try both and see what feels and performs best for you and your style.
At lower intensities of around 230 watts (as already mentioned, this falls into the ‘pushing hard but not flat out effort’ category for most of us), try a cadence of 60–75rpm. This may be more efficient than spinning at 90rpm and may give you a more comfortable ride experience. However, when the effort required rises to a demanding level, then a faster cadence of 80-90rpm can be more efficient and feel better for you.
3. How to make a training plan for Cycling?
When you are looking at how to plan your cycling training for either a cycling tour, charity ride or Gran Fondo, the first thing you need is time to devote to the plan.
The second is knowing what your goals are. Is it just to finish, to finish a gran fondo in a specific time, to be at the front of the group, or is it to get through 8 days back to back and still have plenty of energy for the post ride activities on tour.
Number three is will you DIY or do you need the discipline of coaching? Will your approach be old school and to just ride or will you take up the tech with power meters, heart rate monitors and indoor training apps.
Number four is about how and where you start, which also depends on where your experience and level of fitness sits. The lower your base, the better it is to have more time to get your base fitness to a level where you can then start to ride with more intensity for longer, and keep extending until you hit your final goal.
Below is a list of things that you can start adding to your riding regime to increase your base fitness and strength in preparation for 8 days of back to back climbing on an Italian cycling tour with us.
1. Hill Repeats
As the name suggests, find a hill that is local and short and sharp, and keep riding it.
This is about adding sharp intensity to your riding, with a rest as you descend to the bottom, before you tackle it again.
2. A Hilly Course
Ensure that in your weekly rides, there is a day when you are on a hilly course. Firstly, it will give you a ride that is potentially more satisfying and then secondly, it breaks your rhythm and tempo, ensuring that you work harder.
3. Start easy
As we have mentioned above, easing into a program or training schedule is a better way to get your base to a good level, to then start work on your way to surpassing your goals.
4. Build confidence
If it’s a multi-day ride, find out what the longest and hardest day is and then create a local ride that mirrors the numbers, and regularly ride it. This helps you know in yourself that you can complete it comfortably and achieve the numbers.
5. Rolling Indoors
If you are short on time or the weather has gone Arctic on you, indoor training sessions and studios are a great inclusion to your training. More often than not, they provide short and sharp sessions that do deliver results, when you hit the roads again.
Click the link here to read more about our experience with variousindoor training apps.
6. Develop a plan
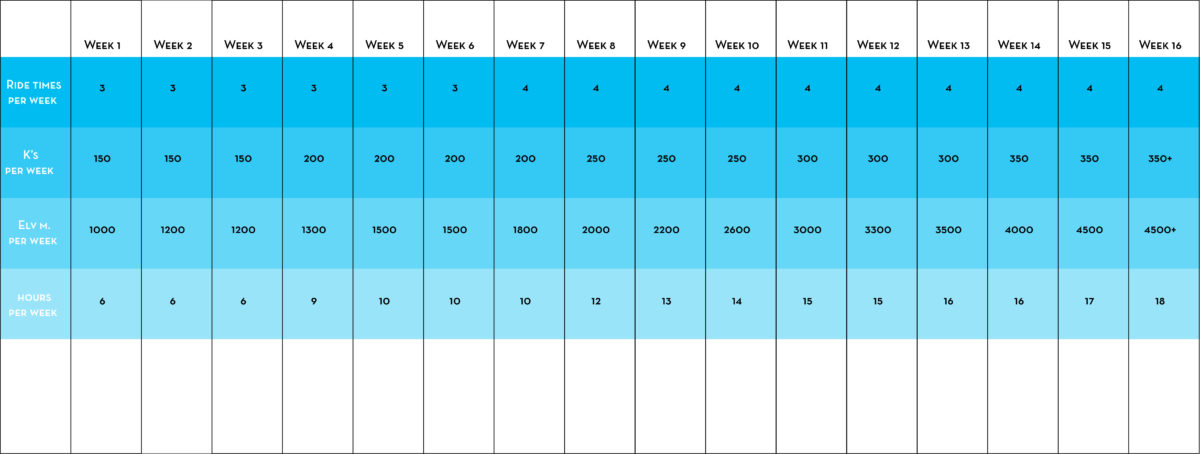
Below is a 16 week training guide that we developed for our Giro d’Italia tour; this is a particularly demanding and beautiful 8 days on the bike tackling some major Italian mountains, with 530km and 13 220m of elevation.
Week one of this plan has a target of 150kms, with 1000m of elevation for the week across six hours, and this then keeps increasing until week sixteen, which requires about 16 hours, where the aim is to ride 350kms with 4500m.
4. How much cycling training is too much?
When looking at your training, do you fall into the too little, too much or just right category?
Over training can be as detrimental as under training, with fatigue setting in, however, how much is too much, is very person specific.
Different people have different guides. A rule of thumb that we believe makes sense is five days on and two days of rest per week when training. This actually means rest, not a session in the gym. It is suggested to us, that you will have a better outcome to do a double session on 1 day and then the next, have a rest day. The double session is also of value because it will be completed on tired legs.
The advice of two days rest per week is both for physical and mental reasons, but one requirement for both days is to keep hydrated. Fridays and Mondays are also two good days to have as rest days. The Friday is good because it will give you a rest before the weekend where you have more time to complete bigger and longer rides. And Monday because after what you have done on the weekend, you should need a rest.
Here is our list of 5 considerations for when you’re training.
1. Avoid Overtraining
Doing too much training firstly leads to fatigue and slowness, and can also lead to your riding feeling like a chore, more than a joy.
2. Sleep
Ensuring that you get at least 8 hours a night is necessary to help reduce fatigue and to aid recovery.
3. Stretching
Stretching is something that is often forgotten, but this is a critical component, particularly as you get older, as we need to stretch out and elongate the muscles that are in a compressed and contracted position when we are on the bike.
4. Diet and Restore
When you do have a training program that you are following, the time commitment is large and you need the space and time to ensure you can maintain a diet that provides enough fuel for the training days, and which restores you on the rest days.
5. Balance
Balance is the key to everything in life, and riding is no different. Having a rest day gives you the space to complete other things and come back to your riding with fresh legs and a fresh spirit.
We trust our Ultimate Guide to Climbing has provided you with some new tools and ideas as you prepare for your next climbing challenge or cycling holiday. As you can see, there are many things to consider and also test for yourself, in terms of which approach works best for you, and in different situations.
However there is one constant. Just enjoy the ascent.